Tuesday 29 July 2014

Summer Hols

I love the summer holidays, the "no rush" mornings, impulsive days out, sitting in the garden reading craft  blogs, summer sewing, the list could go on. Therefore, I thought I would share the tutorials and blog's I have recently perused at leisure, whilst doing laundry (sat in the garden with ice cold drink and my sun brolly up) getting the picture? 

Anyhoo to start off I found a link to these cute creatures


 on my facebook page by Gingermelon Dolls. I always appreciate that someone has taken time to share their creative know how and supply a free pattern for you to join in.  Click the link here to go the blog to download and print the pattern (with a tutorial). She also has quite a list of tutorials, I browsed for hours!

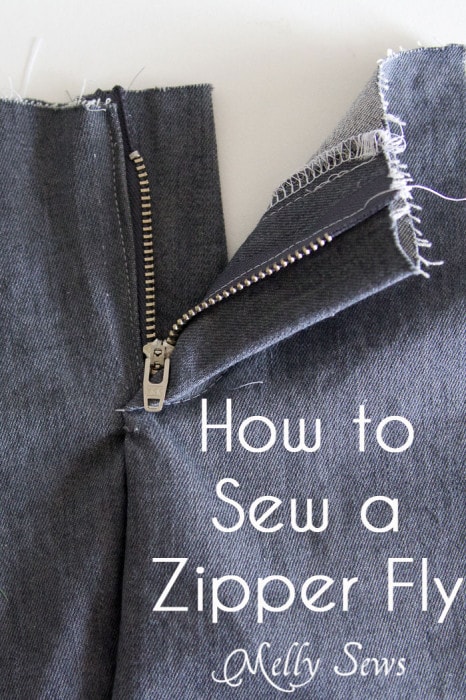
Melly Sews blog has lots of tutorials and links to fabulous things such as sewing vinyls, how to insert a zip fly and lots of fabby patterns for sundresses and baby gifts. Always a good read on a sunny afternoon, see here for this 


and here for this 


and finally from Melly Sews, these two just made me chuckle


My machine definitely has a "cry hole".


I spent a pleasant hour or two going through back copies of Ottobre Design, the magazine is produced in Finland but is available in English directly from their online store or from WH Smith. I use the cheapest greaseproof paper from the supermarket as pattern paper to trace the designs as, not only is it cheap, its more durable for rubbing out mistakes when you trace the wrong line. I love the French style design to the kids clothes and its cheaper than buying lots of patterns. Check it out for yourself here and I love this


Because of the amount of cute things to make from knit/jersey I browsed eBay and bought these


to make . . . well I don't know yet, maybe a soft baby blanket, cool cravat type bibs, or clothes like these


or these


Guess that's another afternoon in the garden to decide then!

Tuesday 22 July 2014

Back to Sewing, Crafting and all things creative

Wow, what a first half year this has been! Back in Feb toddled off to the Doc's with a hard lump in my neck that proved to be quite troublesome. It didn't hurt but was just there in the background like an unwelcome guest. Months of blood tests, ultra sounds and x-rays proved that cells were benign but not what caused it. So after much consideration, we as a family decided to have it cut out and thrown in the bin, ha that would show you, you nasty lump.

Post op pic

Unfortunately the op proved to be more painful than I imagined (still think I'm a spring chicken) and I have been finding it difficult to do everyday tasks. It rather feels like my chin is now attached to my chest!

Still, enough of the moaning (and groaning) lol, with painkillers in hand I shall attempt to create beautiful gifts for friends, family and customers with my trusty old sewing machine. Which leads me ever so innocently to my Etsy shop which, although sparingly stocked, is now open for business.

Click here

Onwards and upwards!


Tuesday 17 December 2013

Christmas Stocking

A quickie tutorial to use up all those little scraps of fabric to make a Christmas Stocking.  There are loads of tutorials for Christmas Stockings but I thought I would share how I did it.

Decide how big to make your stocking, the leg part needs to be wide enough to reach inside for all those goodies! You can either free hand draw a boot shaped stocking or draw around a sock!

I did mine by drawing around a sock with plenty of room around it, then cut it into patchwork pieces. You could leave it all in one piece if you have fabric large enough.

Then use any Christmassy fabric you have to cut out your pieces, don't forget to flip them over so you have a back and a front to sew together later.  I also used up my scraps of iron on stabiliser to stiffen the fabric.

It may be a good idea to number all the pieces so that its easier to fit them back together again like a jigsaw.

One side all done.

Two sides all cut out and stitched back together. You need a left and a right foot so that you can sew them together to make a whole sock. But you knew that already, right?

I used a scrap of white cotton fabric, that I had left over from lining a dress, to make a lining for the stocking. Place one completed patchwork side on top of the white cotton and cut around it. The white fabric didn't have a right or wrong side so I just cut 2 straight off. If your lining fabric is patterned then you need to cut 2 sides as before.

Place your patchwork stockings right sides together and stich the sides, across the bottom and up the other side. Turn right sides out and press.  Sew your lining fabric with right sides together but leave a gap along the bottom.

I hope you can see that I left a 3 to 4 inch gap along the "sole". Also, I used orange thread to show better on here but you can use matching thread lol.


Place the patchwork stocking inside the liner with right sides together. I used a wooden spoon to push it down so that I could match the side seams up.  Stitch all around the top.

You can see from this photo that the right sides of the fabrics are placed together, with my very useful old wooden spoon doing the smoothing.

Pull the patchwork stocking through the gap in the bottom of the lining until they are both the right sides out.


It will look like you have a very long stocking with a foot at either end.  Sew up the gap in the lining of the sole of the stocking then push the lining into the patchwork one and give a final press. Take a piece of ribbon and attach to the open end of the stocking for hanging. Don't foget to fill with yummy things before Christmas morn.


Hang up your stocking and admire with pride : )  Of course you don't HAVE to make your own stockings, you can get them from pound (£1) shop stores in the UK BUT there's such a good feeling about making your own. AND its washable and storeable for next Christmas unlike the cheap felt store bought ones!


Monday 9 December 2013

Kids Fairytale Messenger Bag Tutorial

To make the messenger bag that was offered in the Sew Mama Sew Giveaway Day is really simple, just follow the steps below (no pattern needed).

You will need a main fabric, a lining fabric, heavyweight fusible interfacing, 2 x D Rings, 2 x Trigger Clasps and a magnetic clasp.

Cut Your Fabric

From Main Fabric

Cut  3 panels measuring 10 1/2" x 8 1/2"  (one is for flap) front/back panel

2 panels measuring 8 1/2" x 3" (sides)

1 panel measuring 10 1/2" (bottom)

1 strip measuring 29" x 4" (handle)

2 strips of main fabric for attaching D Rings 3"x 3"

Cut the same from lining fabric apart from the long strip for the handle.


Fuse interfacing to the wrong side of the main fabric (not the handle).

Stitch the side panels (right sides together) to either end of the bottom panel to make a long strip.

Attach the magnetic stud to the front panel 2" from the top of the panel and centred, following the manufacturers instructions.


With right sides together stitch the main fabric front flap to the lining front flap around 3 sides leaving the top of the flap open for turning. Turn and press.

Attach other half of the clasp to the front flap, placed 2 1/2" from bottom of flap and centred.

With right sides together stitch the sides and bottom to front panel, pivot at corners. Attach back panel.

Repeat with lining fabric for main bag body but leave a gap along the bottom seam measuring approx 4 - 5 inches for turning.. You should have 1 flap and 2 main bag bodies as of pic on right.

Line up the raw edges of the flap with the back of the back (right sides together) and tack in place.

Take the 2 small strips to make D ring holders. Fold each one in half and press, open out then fold each edge towards centre crease (wrong sides together) and press, fold in half and press again. Stitch down long edge to make 2 strips. Slip a D ring on each one and tack to each side panel with raw edges matching.


Turn main bag body right side out and place it inside the lining main bag body which is still wrong side out. Line up side seams and around the top. The flap is now sandwiched between the main bag bodies.  Like the flap, the D ring strips will be sandwiched between the main fabric and the lining fabric.

Tack all around top edge then machine stitch together.

Pull bag through gap in lining G E N T L E Y until bag is right sides out.

Press and top stitch all around the top edge, hand stitch gap in lining fabric closed.


Looking inside bag showing raw edges matching.


Showing D Rings tucked inside raw edges lined up.


Finished Bag!!


Unfortunately I forgot to photo the process of making the bag handle but its basically a really long version of the D Ring strips.

Fold handle in half wrong sides together and press. Open out and fold each long edge towards the centre and press again. Keeping the edges folded in, fold entire strip in half length ways and press. Stitch down each long edge, folding in raw edges at each end. Slip trigger clasp on strap, fold fabric over D Ring of trigger clasp and machine stitch firmly in place, repeat with other end of strap.

If you have any problems leave a message in the comments box and I will get back to you as soon as I can. Good luck and please post photos of your finished creations!!


Freebies!!


Everyone likes a freebie right? Well to show that its the season of goodwill I have teamed up with Sew Mama Sew for their great give away day (which lasts all week) and created this cute kids Fairy Tale Messenger Bag. It has a long handle to carry across body, an internal pocket to pop all those little essentials in, a magnetic stud fastening and best of all - your little one gets to colour it in!


The outer shell fabric and internal pocket has cute pictures that can be coloured in using fabric pens, the lining is creamy white cotton fabric.


The handle has trigger clasps so that it can be removed whilst your little one gets busy colouring in!


Eva couldn't wait to get started on hers!

This is the actual bag and pens that will be mailed to you if chosen as the winner!


To win one of these cute bags all you have to do is leave a comment stating what your little one likes to carry around with them. For Eva its her Disney Rabbit Comforter that she's had since the day she was born. Included with the bag will be a pack of fabric pens so the winner can get right to work as soon as their parcel arrives. Please note that the fabric pens will stain clothing so please protect surfaces and clothing. Adult supervision is advised.  Also the bag will need to be pressed with a hot iron to set the colours.

This competition is open internationally, the winner will be chosen by the best comment. Competition opens December 9th and closes at midnight on the 13th of December GMT for UK entrants, 5pm 13th of December PST for international entrants. Winner will be announced in the comments box so please check back to see if its you!!

To enter more great competitions follow the link Sew Mama Sew

This contest is now closed, congrats to the winner Lauren Deel. If anyone who commented below is from the UK the same contest is running on my facebook page here

Saturday 30 November 2013

Christmas is Coming!!

At this time of year I have a mad scramble to make sure all handmade gifts are finished on time. Now after so many years of making gifts, you would think I would be better prepared. Well, no is the short answer lol. Each January my New Years resolution is to be more prepared, start making gifts in the spring for the following Christmas, give myself more time, no rushing, no frantic sewing, a nice easy gift making nine months of relaxed creativity. Then once again I find myself at the beginning of December with loads of gifts still to make. But in my defence, the list of people who prefer a hand made gift to a store bought factory mass production is increasing each year. A hand made gift is lovingly created for the person its intended for. That's not to say a store bought gift isn't bought with much consideration and after all, I cannot sew a Playstation, Xbox or any other technical gift that my teenage son lusts after.  But I can make him a throw for his  bedroom, a school bag, a pencil case, a hoodie, a gym bag - in rock star style design with his favourite band or computer game emblazoned across it (think Minecraft). This keeps us both happy!


Of course in between all this frantic sewing, including the mad dash for supplies, I soooo enjoy reading other peoples blogs. I love to see their creations, digest their tutorials (there is always a different/better/faster way of doing something) and share a little of another's creativity.

So if you would like to share in my little gift making frenzy, keep a watch out for "The 12 Handmade Days of Christmas" coming soon.  Until then perhaps you may like to browse around one of my favourite sites, Sew Mama Sew, which has links for tutorials for handmade gifts, enough for everyday of November! Follow the link for Handmade Holidays here

Keep checking back for my gift giving post.

Please feel free to leave a comment and a photo of your handmade gifts.


Sunday 24 November 2013

Ottobre Design Blazer Pattern Review

I love Ottobre Design magazine,

 I love the continental designs for children and babies, follow the link here -  the page displays in Finnish but has a list at the side to choose your own language. They also have a blog page with links to their Etsy shop and previews of forthcoming issues, click here.

 I love everything about it apart from tracing the patterns from the pattern sheet. Its so hard to follow the right lines even though they are colour coded. Or is that just me?

See what I mean?


It sort of looks like a crazy London Underground Tube Station Map. Having said that, with a bit of time and carefully peeking under the tracing paper you can succeed.

The latest pattern that I've completed is the blazer sewn in a soft Knit/Jersey and although I have never made a jacket with a collar before I didn't find it too difficult to complete. I did struggle with the collar slightly because of the stretch of the fabric. Following the guidelines I only applied interface to the under collar and not to the back of the jacket which resulted in a bit of a jiggle getting the collar placed correctly.

If I make another one (and I'm sure I will) I think I would make a semi circle interface to sandwich the collar inside and see how that works out.  Also I would love to sew it up in a funky patterned fabric similar to the fabric used by the magazine.

Still I'm pleased with the finished result


And so is my little model Eva (she didn't choose the best place to stand) on her way out to a party.


A quick goodbye to Eddie L Izzard, the family pet Leopard Gecko and off she popped. I'm so lucky that I get to see my granddaughter every weekend, she really does light up my life.

Feel free to share your comments and photo's of Ottobre patterns that you have sewn and who you sew for, is it your children, grandchildren, or family & friends?